How to Create a New Tax Rate
Last updated: June 29, 2026
Campfire’s Help Center has moved. As of June 2026, this article is no longer being updated. Visit our new Help Center: view here.
Overview
Tax rates in Campfire allow you to apply the correct tax calculations to customer invoices and vendor bills. This guide walks through how to create and configure a new tax rate, including setting the tax code, description, and GL account association.
Step 1 — Navigate to Tax Rates
In Campfire, go to Settings -> Tax Rates -> Create Tax Rate
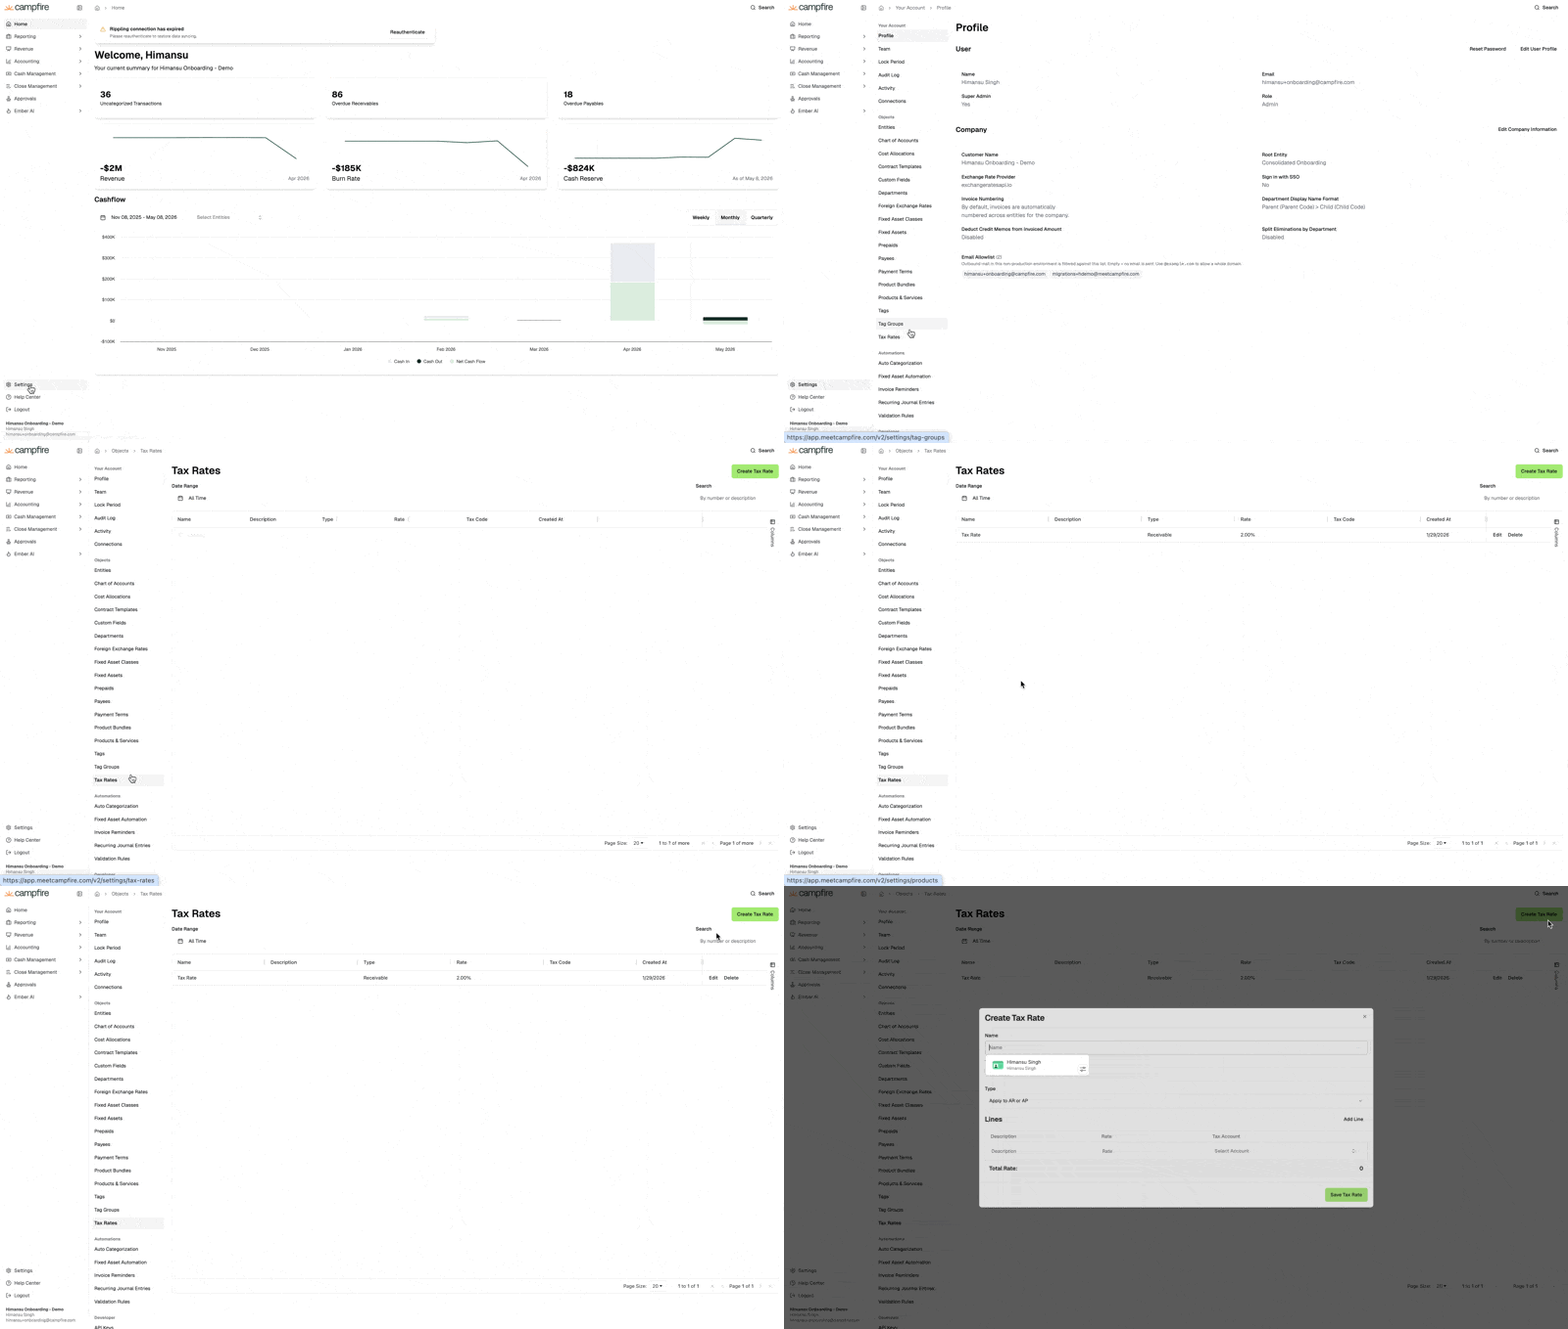
Step 3 — Populate the Tax Rate Fields
Fill in the following fields:
Field | Description |
|---|---|
Name | A descriptive name for the tax rate (e.g., "California Sales Tax") |
Tax Code | The tax code associated with this rate, as defined by your tax provider or finance team |
Apply to AR or AP | Select whether this rate applies to Accounts Receivable (customer invoices) or Accounts Payable (vendor bills). |
Description | Description of the Tax Rate |
Rate (%) | The percentage rate to apply (0.2 = 2%) |
GL Account | The account this tax amount should post to residing in your COA that is uploaded |
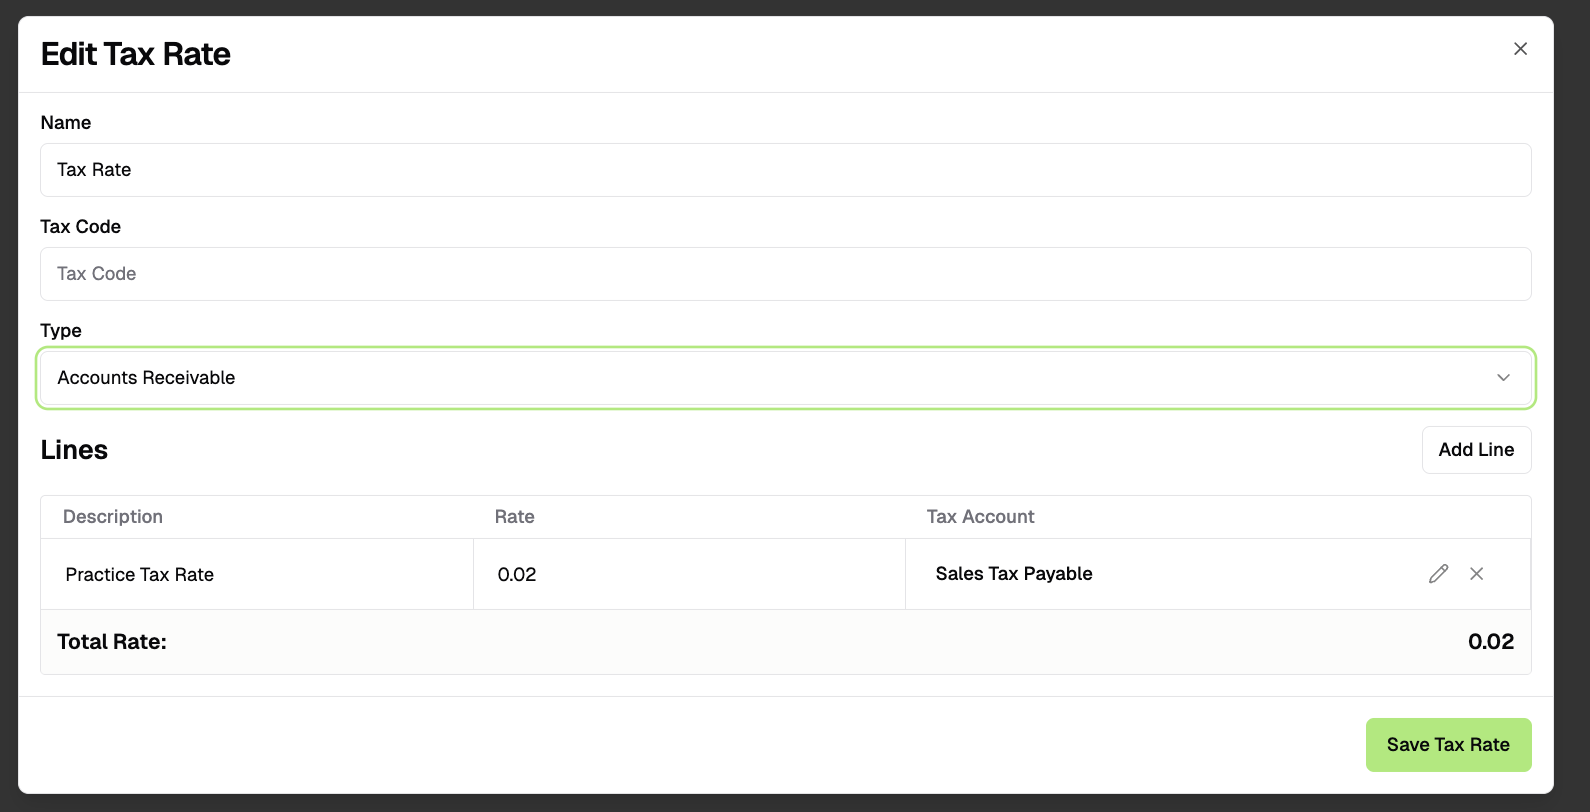
Step 4 — Save the Tax Rate
Once all fields are configured, click Save Tax Rate. The tax rate will now be available to apply to invoices and bills across Campfire.